Remember my little silver Christmas tree with the “presents” underneath?
 Well, before you send your Christmas cards off to be recycled, try a little of this recycling. It’s a fun project, you get to keep your cards, make new decorations for next Christmas(!), and children can do it too!
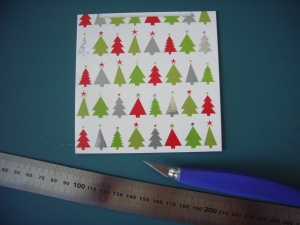
So what are we going to do? We’re going to turn this
 :: ruler (or a patchwork ruler)
:: mat to work on (I turn my patchwork mat over)
:: craft knife (or scissors for the children)
:: pencil
:: and of course, your cards
First step is to cut the card in two to separate front and back
 Cut a square from the card front. I measure the width and cut the length accordingly. For this card, it measured 4¼” across the width, so I trimmed the length to 4¼”.
 ‘Turn the card over and on the wrong side, draw diagonal lines from corner to corner to mark the centre of the card
 Fold one card corner up to the centre mark and press along the fold with your fingers.
 Now fold again, taking the fold up to the drawn line, and again, press with your fingers.
 Unfold this side, and repeat with the other three corners.
The folds will have made a little square of fold lines near the centre. Locate the outer corner of these “fold” squares and mark the corner with a pencil
 On two sides only, mark with a pencil from the corner dot out to the card edge.
 Now cut along these four lines
 Then fold along the second line to make the sides of the box.
 Twist the cut edges around to make the next box side
 Lift up the corner and fold it up and over the side and tuck into the box
 Repeat on the other side.
 And there’s your box lid!
 To make the box base, cut a square from the other side of the card, but it MUST be ¼” SMALLER than the box lid square. In my case, 4″.
 Repeat all the above steps to make the box base
Pop the base into the lid
To make a hanging decoration, before folding over the last corner of the lid, glue or staple a length of tinsel or ribbon onto the twist-in-sides
 Fold and tuck that last corner
 Put the lid and base together and there you have a hanging decoration!
 Just a word of warning – these little boxes are addictive, so much fun to make!
 It doesn’t matter how big or small your cards are, just remember to cut the box base ¼” smaller than the box lid.
I hope you can follow these instructions – some of the photos are a bit wonky due to one handed camera action! Have fun!
And all the best to you and yours for a Happy New Year!
Happy stitching
Meredithe


I have got a similar box pattern but not as complicated as yours
I use my cards as Christmas presents tags for the next year
love the box idea, very nice.
Kathie